Looker Studio is Google's data visualization and business intelligence platform. This guide explains how to connect your Neon Postgres database to Looker Studio using a PostgreSQL data source.
Get your database connection string
- In the Neon Console, select the project and branch you want to connect to.
- On the Project dashboard, click Connect.
- Click Show Password and copy the connection string.
For more details, see Connect from any application.
Add a PostgreSQL data source in Looker Studio
-
In Looker Studio, Create > Data Source.
-
Search for and select the PostgreSQL connector, and authorize it.
-
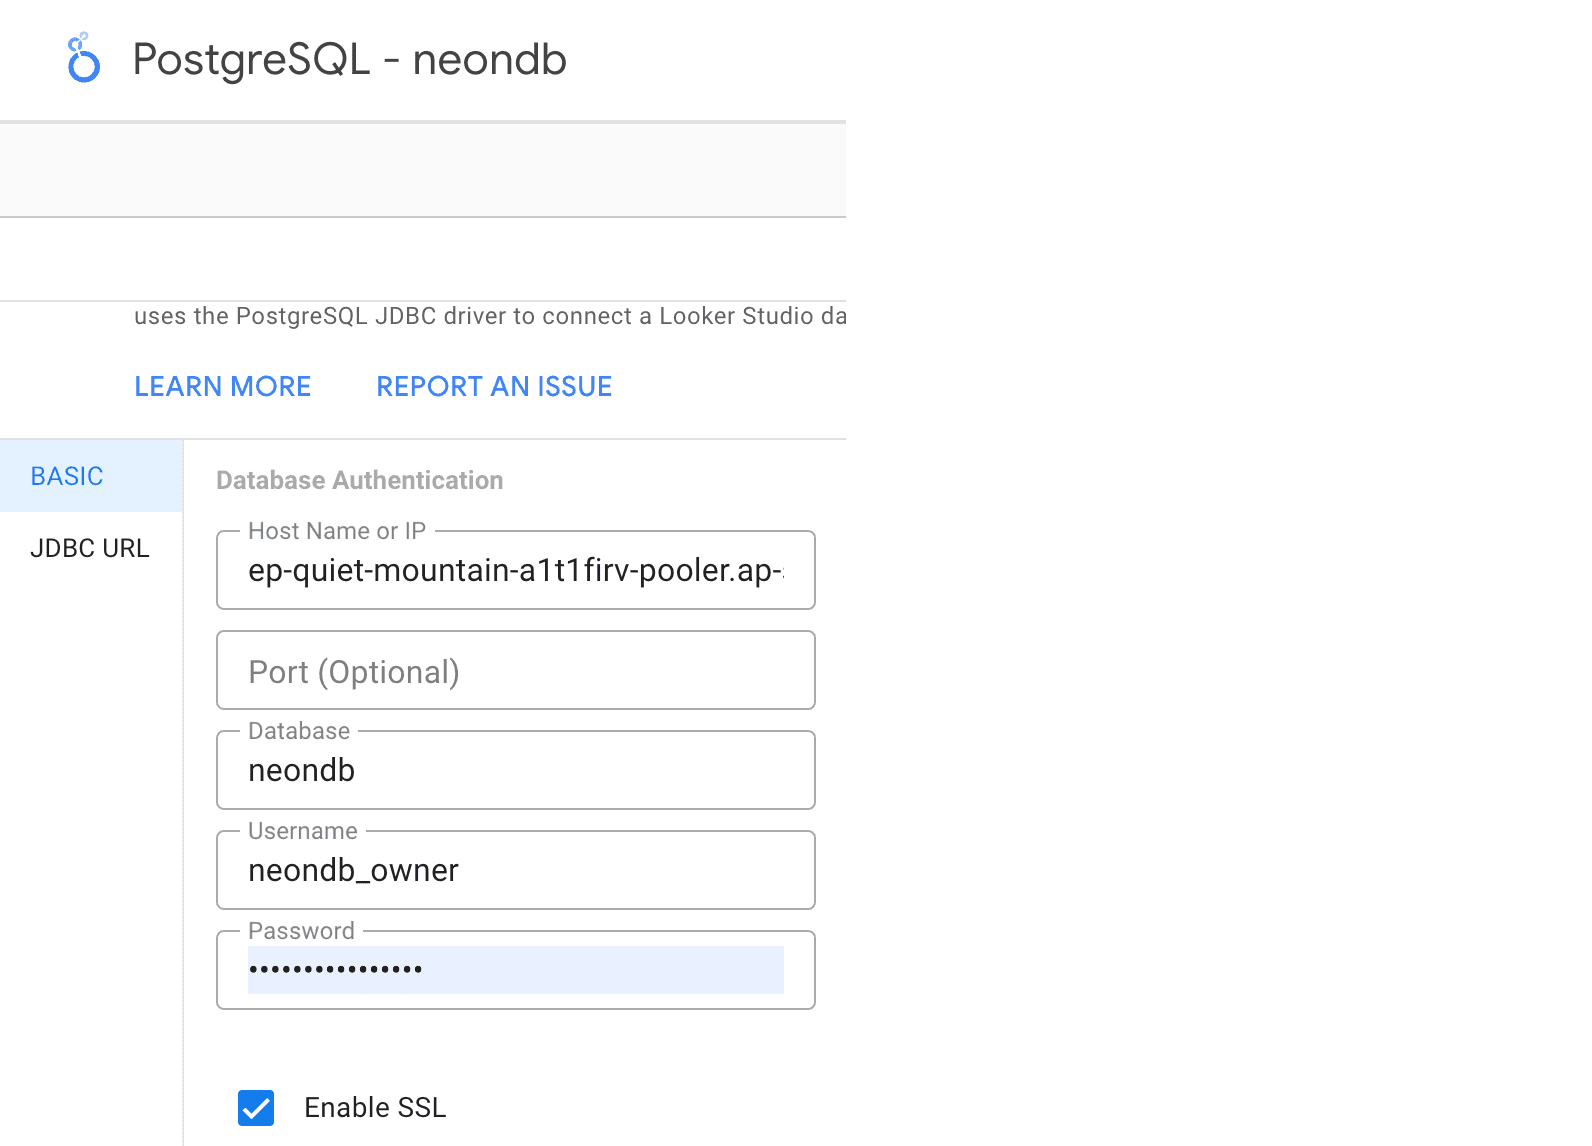
In the Basic section, fill in the fields using the details from your connection string.
For example, if your connection string is:
psql 'postgresql://neondb_owner:npg_aaaaaaaaaaaa@ep-quiet-mountain-a1t1firv-pooler.ap-southeast-1.aws.neon.tech/neondb?sslmode=require&channel_binding=require'You would enter:
- Host name or IP:
ep-quiet-mountain-a1t1firv-pooler.ap-southeast-1.aws.neon.tech - Port (optional): Leave blank
- Database:
neondb - Username:
neondb_owner - Password:
npg_aaaaaaaaaaaa
- Host name or IP:
-
Upload the server certificate
-
Download the
isrgrootx1.pemfile from https://letsencrypt.org/certs/isrgrootx1.pem. For more information about SSL certificates, see Connect to Neon securely. -
In Looker Studio, upload the
isrgrootx1.pemfile using the Upload button next to the Server Certificate box.
-

Need help?
Join our Discord Server to ask questions or see what others are doing with Neon. For paid plan support options, see Support.